Transactions may include the following tabs.
Click on a tab name to jump to its corresponding instructions:
- General
- Property
- Documents
- Checklist
- People
- Financial
- Base Commission
- Bonus Commission (if included in your plan)
- Earnest Money (if included in your plan)
- Calendar
- Activity
- Action Plan (if included in your plan)
Note: The available tabs and their order are determined by the Brokerage Manager.
Please submit change requests to Support@TotalBrokerage.com.
GENERAL
- The General tab in TotalBrokerage acts as the central hub for managing the foundational details of a transaction.
- This is the first tab you see when creating a new transaction, it allows you to edit and manage essential information that defines and drives the progress of the transaction.

Name: Customize the transaction's name for better representation and organizational purposes.
Represent: Indicates your representation status in the transaction (buyer, seller, landlord, or tenant), defaulting to your choice in the Wizard Questions.
Type: Assign a transaction type, such as residential, multifamily, or vacant land, to aid in efficient categorization and filtering.
Tags: If your brokerage manager has created transaction tags, you can assign one to your transaction in this section. These tags help organize and filter transactions based on brokerage-specific criteria. (Note for brokerage managers: Click here to learn how to add user fields, including transaction tags.)
Status: Keep the transaction status updated through active, under contract, or closed stages.
Transaction Email Address: This dedicated email address is associated with the transaction. You can review and import attachments sent to this address via the Email tab.
Notes: An unlimited space for adding notes or links relevant to the transaction.
Links: Direct access to clickable links added in the Notes section.
MLS Data Import (if included in your Plan):

Functionality: This feature automatically imports MLS data directly into your transaction based on the entered MLS number.
Usage: Enter the MLS number and click the "MLS Data Import" button. Depending on the data available in your MLS feed, a window will pop up with options to import Property, Agent, Contact, and MLS PDF.
NOTE: If certain details aren't imported, it means they are not available in your MLS. The existing 'Fetch Info' button in the Property tab remains operational for importing only property information.
RESTRICTED NOTES (if included in your Plan): These private notes can only be accessed and edited by users with the Manager, Accountant, or Compliance Officer roles. Use this section to add sensitive information that should be kept confidential.
PROPERTY
Start typing the address, and a dropdown list of matching results will appear.
Select the appropriate address from the list, and the full address will automatically populate the corresponding fields.

Click Save when finished.
Using the RETS feed (if included in your Plan)
- NOTE: this button will only appear if there is an active rets connection for your brokerage.
- If enabled by the Brokerage, you can easily import property listing information from your local realtor association to your TotalBrokerage.
- To do this, under the "Property" tab, enter a local MLS number into the MLS number field and click the “Fetch Info” icon.

- Within a few seconds, all of the property information should populate their respective fields.
- Please remember to click “Save” when you are done.

In the Email tab of a transaction, you can view emails that have been sent to the transaction's email address. Click on the name of the email to open it.

When an email is sent to the Transaction Email address, it will appear in the Email tab.

Click on the email subject to Open the email.

Because this email was sent from the Transaction Owner's email address, any attached PDF's will be Imported to the Documents tab.
NOTE: If the email was sent from a different email address, the email will display in the Email tab, but the email would need to be opened and the document manually Imported or Downloaded using the icons at the bottom of the page.
When Importing, you will receive the following Alert.

If an email has multiple attachments, select Import All to batch-import all attachments to the Documents tab.

DOCUMENTS
The Documents tab stores all files associated with the transaction, including those added through Wizard Questions, forms, or uploaded PDFs.
Within the Documents section, you'll find sub-tabs such as Signature Requests, Shared Document Access, Document Previews, and Archived Documents.

In this tab you also have the ability to manage your documents using the Actions and Operations dropdown menu.
- + Add Form from Library
- Rerun Wizard
- Upload PDF
- Merge PDFs
- Create Summary PDF
- Send Document Preview
- Request Signatures
- Share Documents
- Download Documents
- Add a Task
- Add/Delete Quick Access Widget
- Move to Folder
- Page Tools
- Rename
- Fields
- Mark Signed
- Archive
- Copy
- View
- Download
CHECKLIST
- Each transaction includes a Checklist tab, where you can complete required tasks and upload necessary documents for brokerage approval.
- These tasks are configured by the Brokerage Manager to ensure the transaction complies with state and local regulations.
- The checklist must be approved by the Compliance Officer before the agent can be cleared to receive commission following the property's closing

If no checklist is attached to the transaction or if you need a different one, click the Add New button and choose the appropriate checklist from the list.
NOTE: Consult your Broker or Manager if unsure which checklist to use.

Types of Checklist Steps
Checklists may include several types of steps, each with specific instructions:
1. Required Tasks
These are mandatory items. Once a required task is complete, click Mark Done to indicate completion.
2. Optional Tasks
Optional tasks can be marked as not applicable if needed. You may also provide a reason, which will be visible on the task. 
3. Select Documents (Required or Optional)
You can either:
- Use the Select a document to add dropdown to attach an existing document from the transaction’s Documents tab, or
- Click Upload a File to add a PDF from your computer.
- After uploading or selecting a document, click Mark Done.
- If the step is optional and not needed, click Mark Not Applicable.

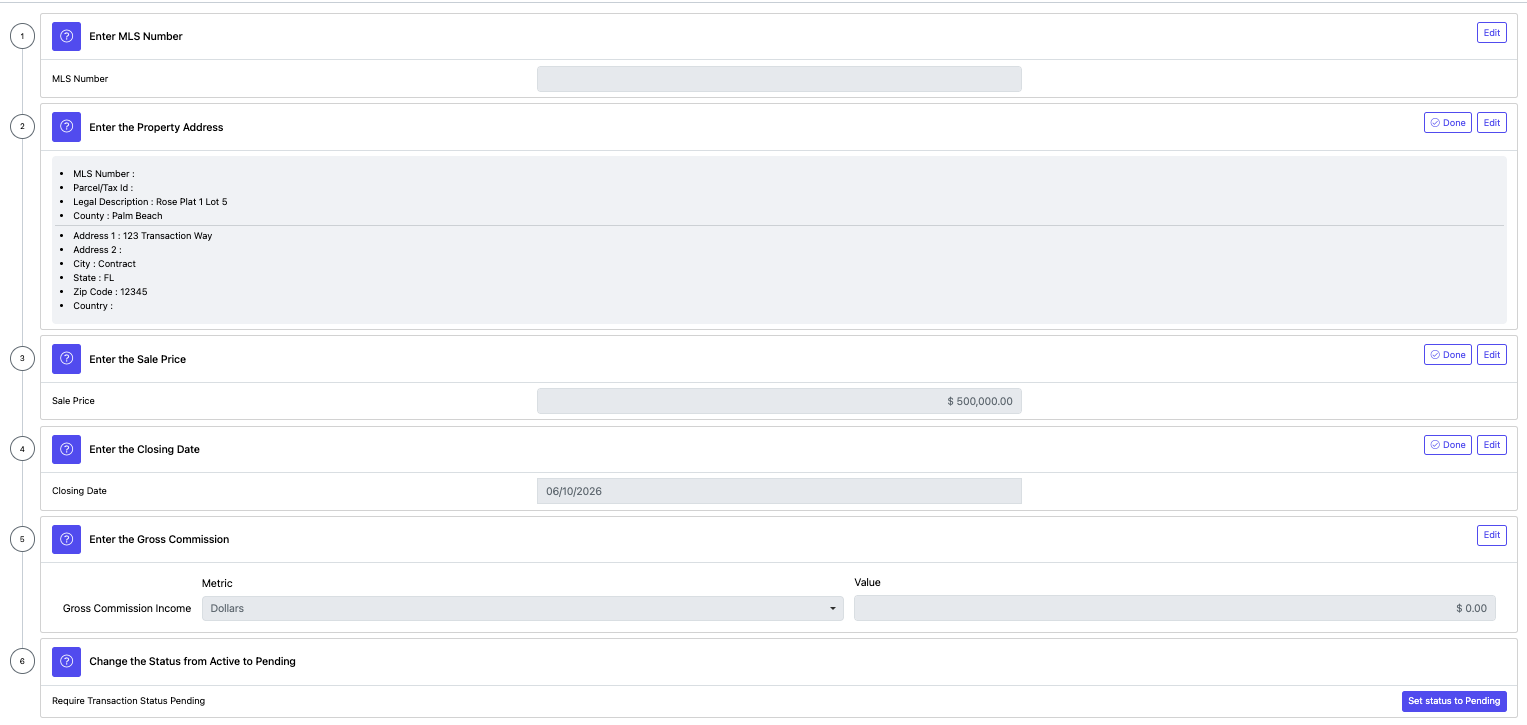
4. Required Information
Some tasks will prompt you to enter specific transaction details, such as:
- MLS Number
- Property Information
- Financial Information
- Date Information
- Commission Information
- Transaction Status - Clicking the button marks the task as complete, updates the status, and saves it to the General tab.

If the field is empty, click Edit, enter the required information, and then click Done to complete the task.
5. Request Review
Submits all previous items to a compliance officer for review. You cannot continue past this point until it is approved. If you wish to change any items after requesting the review, you can click Cancel Review Request and make the appropriate adjustments.
Active Checklists: You can toggle between the checklists (if there are multiple) by clicking on the name.
Archived Checklists: Click the Archived button to view any checklists that are no longer in use.

INITIAL AI COMPLIANCE REVIEW
After submitting your checklist for review, AI will perform an initial review and display a list of any items that may need attention. Since this is a preliminary review, we recommend carefully reviewing the report and making any necessary corrections.
Here are a few examples:


If corrections are needed, click the “Cancel Review Request” button.  Then mark the applicable checklist step as “Not Done” and update the document or information as needed before resubmitting for review.
NOTE: The AI checklist review is intended as a preliminary review tool and is not guaranteed to identify all issues. Final review results, including Pass/Fail decisions, will be completed and determined by your Compliance Officer.
PEOPLE
In the “People” tab, you can choose the different parties who will be involved in a transaction including; Agents, Vendors, and Contacts (Buyers, Sellers, Landlords, Tenants). Email addresses and Phone numbers will display for each as long as the information has been added to their CRM record.
AGENTS: Transaction Owner, Cooperating Agent, Additional Agents, Transaction Coordinator
The first section of the people tab deals with Agents.
The first agent in this tab will be the Transaction Owner (you or someone in your brokerage).
In the example below, the Transaction Owner is the buyer's agent for this transaction.
The second agent in this tab will be the Cooperating Agent. This will be the other agent you are working with. For example, if you are the buyer's agent, the cooperating agent will be the seller's agent. This agent will be a vendor with the vendor type of Agent.

To add a Cooperating Agent, click the "Add" button.
Enter the agent's name to create a new Vendor Contact, or if the agent is already in your CRM, start typing the name and select it from the dropdown menu.

If a cooperating agent has already been assigned, an icon with three dots will display.
Clicking the icon will display an operations menu where you can Change, Remove, or View the Vendor (Agent).

ADDITIONAL AGENT
The Additional Agents are other agents in your brokerage that will be working with you on this transaction.
It will give them permission to all vendors and contacts you have added to the people tab along with permission to edit transaction details and documents.
Adding an Additional Agent allows them limited access to this transaction.
They can work in the documents, property, financials, earnest money, calendar, email, activities, and checklist tabs. NOTE: An Additional Agent cannot edit the People tab.
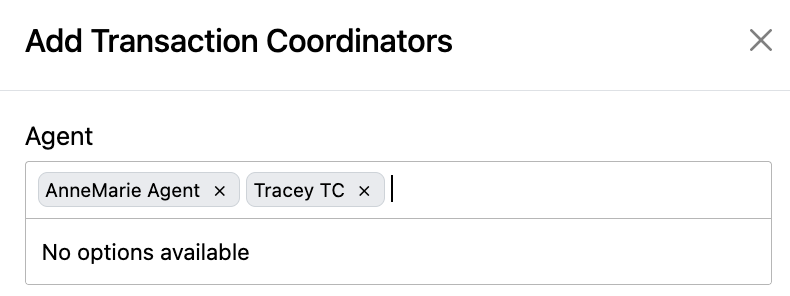
TRANSACTION COORDINATOR
A transaction coordinator will have full access to this transaction, including all information, documents, financials, and data.
Additionally, they will have access to all associated CRM contacts for this transaction. They are unable to lock the commissions.
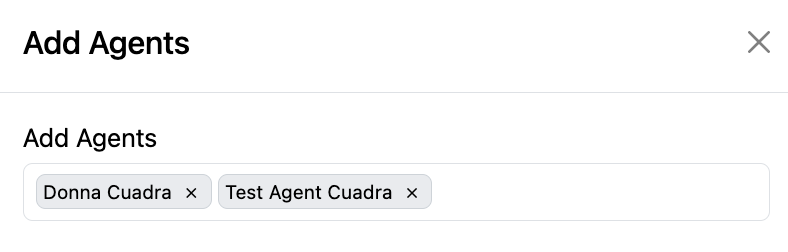
You can add an Additional Agent or Transaction Coordinator by clicking Add on the right side.

The following editor will open.
Click Choose to select an Agent or Transaction Coordinator from the dropdown, or begin typing a first name to search.
Multiple Agents and Transaction Coordinators can be added within one action.


VENDORS
The next section of the people tab deals with Vendors.

- If the Vendor Type is not listed, you can add one by clicking Add Vendor to the right side.
- The following editor will come up.

- Click Choose to select a Vendor Type.
- To select the Vendor, click Choose and Vendor from the dropdown menu.
- If you need to create a Vendor as well, type to Search or add options.
- Then click Submit at the bottom of the page.

After you add a vendor you will have an operations menu for that vendor with the follow choices:
- Popout Arrow: This opens the vendor information in a new tab.

- Change Vendor: This allows you to swap out a vendor.
- Clear: Which will remove the Vendor Name and will leave the Vendor Type empty.
- Remove: Which will remove the Vendor Type from the People tab. You will not be able to remove a vendor from the people tab if there is the same type of vendor with a higher number. For example, if there was an Appraiser 2 on this transaction you would not be able to remove Appraiser 1 until Appraiser 2 is removed, however, you can still clear the vendor.
CONTACTS
The Contacts section works exactly the same as the Vendors section, except instead of vendor type, you would choose person type (buyer, seller, landlord, tenant).
- Popout Arrow: This opens the vendor information in a new tab.
- Change Contact: This allows you to swap out a Contact.
- Clear: This will remove a Contact's info and leave the box empty.
- Remove: This will remove Buyer 1 from the People tab. You will not be able to remove a contact from the People tab if there is the same type of contact with a higher number. For example, since there is a Buyer 2 on this transaction, you would not be able to remove Buyer 1 until Buyer 2 is removed.

FINANCIAL
In the “Financial" tab, you can edit the Transaction Financials, and Transaction Expenses.
Note: If there are additional agents that you are co-representing, you can input expenses that are agent-specific.
The additional agent must first be added to the "People" tab. Agents can only see only their expenses.
Managers can see all Agents' expenses.
(If you are setting up these financials, to create a field that is a percentage instead of a flat amount, make sure the field code of the user field ends with "-percent").

To add new Transaction Expense types; click on the blue "+ Add" button and type in the appropriate Name and Cost information.
If you want to delete an expense, hit the red dash (-) button to the right of the expense.
Once an expense name is added, it will be saved for future transaction use.

Remember to click “Save” when you’re done.
BASE COMMISSION
Use the Base Commission tab to calculate the agent's commission, apply any necessary credits or deductions, and determine the net amounts payable to both the agent and the broker.
Setting the Base Commission Format
You can express the Commission Income in either Dollars or Percentages:
- By default, it is set to Dollars.
- To switch to Percentage, use the dropdown menu next to "Commission Income."
Once you've selected your preferred format:
- Enter the appropriate dollar amount or percentage in the text box under "Gross Commission Income."

Applying Credits and Deductions: This field appears in multiple places on the Base Commission tab:
Affecting Gross Income
Before/After Split
Affecting Broker Net Income
Under Credits and Deductions Affecting Gross Income, you can add line items that apply to the gross commission, which will be shared with agents participating in the transaction.
Adding a Line Item:
- Click on the blue text:
- "There are no line items to display. Click here to add a line item."
- Enter the details of the line item as needed.

- Upon clicking the link, a new line will appear with various dropdown menus and an empty text box that you can edit to enter the necessary details.

- The dropdown menu on the far left allows you to select the line item type as either a "Deduction" or "Credit."
- This selection determines whether the amount will be deducted from or credited to the transaction.

- You may optionally specify a memo for the line item by clicking on the Memo Icon to the right.


- If you must delete the line item, click the three dots and select Remove.

- If you need to add additional line items, you can click “+Add Line”.

- If you are co-representing a party in a transaction, you can adjust the Commission Splits shared between you and the other agent(s).
- Before modifying the split percentage, ensure all collaborating agent(s) have been added to the transaction's People tab.
- Managers can view all agents, while agents can only see their information within the box.

After confirming that all co-representing agents have been added to the transaction, simply click "Edit Splits" to make changes.

At this stage, you'll select whether to split the gross commission among agents using a Percentage or Flat Amount.

Enter the appropriate split for each agent in the text box next to their name.
After entering the percentages or flat amounts, click the blue "Submit" button to apply the changes.


Note: When editing Credits and Deductions Before and/or After the Split and the Split with the Broker, you can customize this information for each agent.
To edit the appropriate information for each agent, click on the Agent Name and edit the particular information accordingly.

Please scroll down and click the blue “Save” button at the bottom of the page. 
BONUS COMMISSION
Bonus Commission Income can be expressed in “Dollars” or a “Percentage”.
The default option will be in “Dollars”, but if you want to change it to “Percentage”, you can click on the drop down menu next to "Commission Income" and choose the “Percentage” option.
After selecting how you want 'Commission Income' to be expressed, enter the appropriate dollar amount or percentage in the text box to the right of 'Commission Income'.

Commission Splits: If you are co-representing a party to a transaction, you can edit the commission amount that you and the other agent(s) will be sharing.
Before editing the split, make sure that you have added the additional agent(s) that you are working with on this particular transaction in the People tab of the transaction.
Once you have made sure that you have added all the agents that are co-representing a party in the transaction; simply click on the “Edit Splits” tab.

Select either Percentage or Flat Amount.
Type in the text box next to each Agent name the appropriate split that each agent will be receiving.
Upon entering the information for each agent, make sure to click on the blue “Submit” button.


If you need to cancel the editing you are working on, you can click on the X.

Compensation Breakdown:
If your commission split is not displayed, you can enter your Compensation Breakdown.
Brokerage Managers can edit a commission split by selecting Override Commission to edit the percentage split that an agent shares with the Broker.
In order to do so, simply type in the appropriate percentage the agent would receive, and then press the blue “Save” button at the bottom of the page.
If you enter 80%, that is the amount the Agent keeps.

EARNEST MONEY
In the 'Earnest Money' tab, you can track all earnest money associated with this transaction.

Click + Add to enter a new earnest money deposit.
This will pop up the following screen to add new Earnest Money. Bank account, amount, and date are all required fields to create this Earnest Money. If this is money coming into your account, please check the box below the amount.
Click Submit.

The Earnest Money will now appear in the table.
To edit or remove it, use the options in the Operations column.

As you add more Earnest Money entries, the Balance column will automatically update to reflect the current total for the transaction.

Note: Additional bank accounts for the Brokerage can be added by navigating to Setup → UserFields → Brokerage User Fields.
Only Brokerage Managers and Accountants have permission to add these fields.
CALENDAR
In the “Calendar” tab, you can edit important dates for your transaction and view current tasks for this transaction. These dates will be added to your global calendar.
Note: Brokerage managers can configure the dates that are available in the Setup > User Fields > [Brokerage Name] > Transaction Date.

DATES
To edit, click "Add Date" for the field you want to change.

- Click the Gray bar to Add/edit the calendar date.

- Select the Date.

- You may set a reminder and select the color of the event.
- Once finished, click Save.


TO-DO's / TASKS
On the right side, you can view the current tasks for this transaction or add a new one.

- When adding a new one it will automatically select the current transaction, just fill out the description, Date/Time and Save.


- Check out our dashboard helpdesk for more information on how to use the to-do widget.
ACTIVITY
Under the “Activity” tab, events will automatically create entries for important transaction events, including:
When a contact, vendor, or agent has been added to the transaction
When a contact, vendor, or agent has been removed from the transaction
When documents have been sent for signing
When a signature request has been completed
When an email has been sent to the transaction’s dropbox email address
When documents have been shared with a contact or vendor
When the transaction’s status has been updated
When a checklist has been archived
When the transaction’s commissions have been finalized
When the transaction’s commissions have been synchronized to Quickbooks Online
This tab functions just like the "Activity" tab in your CRM, which means that you can also record and review notes, keep track of important events, and collaborate with other agents on the transaction.
More activity types user fields can be added at the brokerage level only to be used in transaction activities.
Click + Add Activity in the upper right corner, and the following box will open.


Type: Use the dropdown next to Note to see other types of activities.
Description: Type your Note in the Description box.
Notify Agents: Click in the box to see the available options or begin typing the person's name and click Add at the bottom.
Once the Activity has been created you can add it to your Calendar or Add a task by clicking on the 3 dots icon to the right of the activity.

ACTION PLAN
When working within a Transaction, you can create Action Plans. This feature allows an agent to develop a plan of action for the Transaction. Here they can create a new plan or import and edit an existing plan. Follow the steps below for more information.
The first step is clicking on the Action Plan tab.
This is where you can create a new plan of action or import any existing plans.

The Action Plan section offers two types: creating a new plan or importing a plan.
+ ADD PLAN

When selecting + Add Plan, you will be asked for a name, description, and whether the plan applies to certain transaction statuses.
Click Submit when done.

Next, you will build the Action Plan Steps.
Click + Add Action and create the task by using the dropdown options.
Click Save when done.

IMPORT PLAN
You also have the option to import an existing plan.
Click Import Plan.
Using the dropdown, choose the plan and click Submit.

This shows the steps and the order in which the plan will take place.
Click + Add Action to add steps if needed.
Use the three dots icon to Edit or Copy a step.
Click Save when done.
An Action Plan can be deactivated anytime by selecting "Make Inactive" from the Running dropdown.

(Click here for instructions on creating a Transaction Action Plan that can be imported into future transactions).