In the “People” tab, you can choose the different parties who will be involved in a transaction including; Agents, Vendors, and Contacts (Buyers, Sellers, Landlords, Tenants).
The first section of the people tab deals with Agents. The first agent in this tab will be the Transaction Owner (you or someone in your brokerage), also the buyer's agent for this transaction.
The second agent in this tab will be the Cooperating Agent. This will be the other agent you are working with. For example, if you are the buyer's agent, the cooperating agent will be the seller's agent. This agent will be a vendor with the vendor type of Agent.

You can add the Cooperating Agent by clicking the add button. Then enter the Agent's name to create a new Vendor Contact or if the agent is already in your CRM, you can start typing the name and select from the dropdown menu.

If a cooperating agent is already assigned, an icon with 3 dots will display. Clicking the icon will display an operations menu where you can Change, Remove, or View the Vendor (Agent).

The Additional Agents are other agents in your brokerage that will be working with you on this transaction. It will give them permission to all vendors and contacts you have added to the people tab along with permission to edit transaction details and documents. Adding an Additional Agent allows them limited access to this transaction. They can work in the documents, property, financials, earnest money, calendar, email, activities, and checklist tabs.
A transaction coordinator will have full access to this transaction, including all information, documents, financials, and data. Additionally, they will have access to all associated CRM contacts for this transaction. They are unable to lock the commissions.
You can add an Additional Agent or Transaction Coordinator by clicking Add on the right side.

The following editor will open.
Click Choose to select an agent from the dropdown, or type the first name to search.


Select an agent from the menu and click Submit.
The next section of the people tab deals with Vendors.
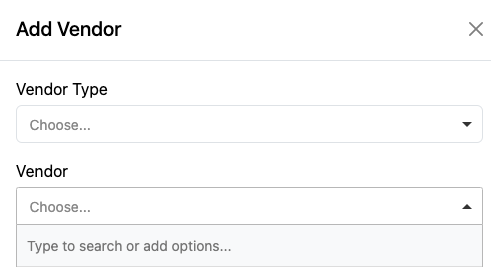
 If the Vendor Type is not listed, you can add one by clicking Add Vendor to the right side. The following editor will come up. Click Choose to select a Vendor Type. To select the Vendor, click Choose and Vendor from the dropdown menu. If you need to create a Vendor as well, type to Search or add options. Then click Submit at the bottom of the page.

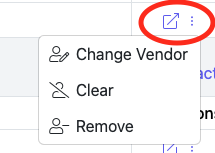
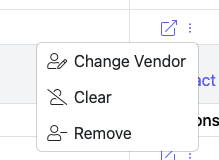
After you add a vendor you will have an operations menu for that vendor with the follow choices:
- Popout Arrow: This opens the vendor information in a new tab.
- Change Vendor: This allows you to swap out a vendor.
- Clear: Which will remove the Vendor Name and will leave the Vendor Type empty.
- Remove: Which will remove the Vendor Type from the People tab. You will not be able to remove a vendor from the people tab if there is the same type of vendor with a higher number. For example, if there was an Appraiser 2 on this transaction you would not be able to remove Appraiser 1 until Appraiser 2 is removed, however, you can still clear the vendor.
 |  |
The Contacts section works exactly the same as the Vendors section, except instead of vendor type, you would choose person type (buyer, seller, landlord, tenant).
- Popout Arrow: This opens the vendor information in a new tab.
- Change Contact: This allows you to swap out a Contact.
- Clear: This will remove a Contact's info and leave the box empty.
- Remove: This will remove Buyer 1 from the People tab. You will not be able to remove a contact from the People tab if there is the same type of contact with a higher number. For example, since there is a Buyer 2 on this transaction, you would not be able to remove Buyer 1 until Buyer 2 is removed.


