Accessing the CRM
From your dashboard, click CRM → View Contacts on the left side of the screen.

SEARCHING FOR CONTACTS
You can perform Simple or Advanced searches to find specific contacts.
Simple Search:
- Stay in the Search tab.
- Type your query in the search box.
- Click the Search button on the right.
Use +Add Filter - To add parameters to the search


- Click on a criteria to use
- Click Choose to see the selection choices

- Make your selection and click Add

- You can continue adding additional filters if needed.
- When finished, click Apply.

- Your matching results will appear below the search box.
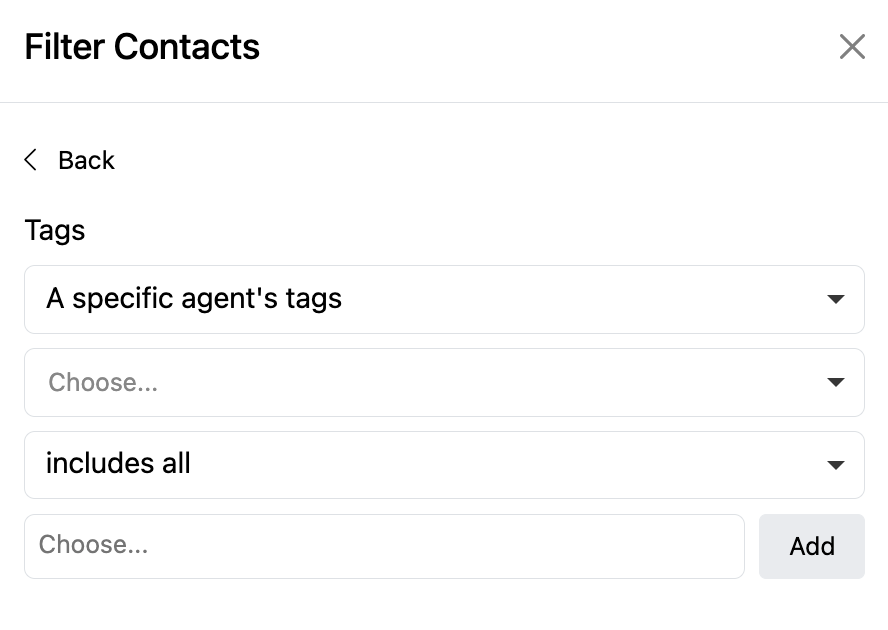
NOTE: Managers can filter tags by owner. Click Add Filter > Tags. In the first dropdown, select A specific agent's tags, then use the next dropdown to choose the desired agent. Only tags owned by that agent will be displayed.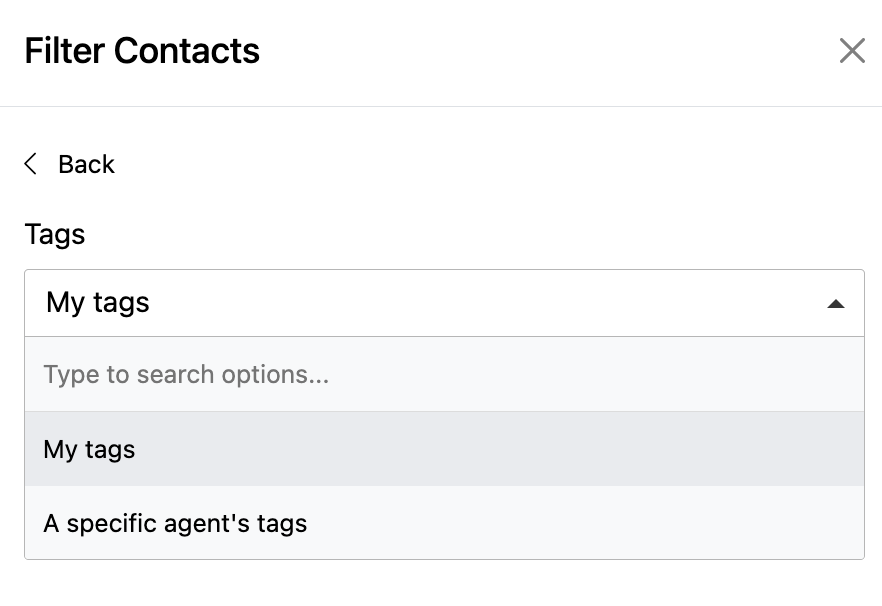
- Show: Here you can adjust how many results are displayed per page by clicking the down arrow next to entries.
- Make your selection.
- Click the Save icon.


SEARCH BY SPECIFIC FIELDS
In the General, Preferences, Marketing, Address, or Details tab, you can search using isolation fields to filter by attributes.
Tag-Based Search Options
When searching for contacts by tags, you have four options:
- Includes all – Contacts must have all selected tags.
- Includes any – Contacts must have at least one selected tag.
- Doesn't include all – Contacts that have all selected tags will be excluded.
- Doesn't include any – Contacts that have at least one selected tag will be excluded.
Viewing Managed Users' Contacts
If you manage other users in TotalBrokerage, you will see a checkbox labeled "Include contacts owned by managed accounts":
- If unchecked, only your contacts appear.
- If checked, contacts from all your managed users will be included.
- If you change this setting, a save icon will appear, allowing you to store your preference for future use.

SELECT MULTIPLE CONTACTS
- In the search results, a checkbox appears next to each contact.
- Select multiple contacts by checking the boxes next to their names.

BULK ACTIONS
Once you've selected contacts, click the "Actions" button (top right) to choose a bulk action. (If no contacts are selected, the action will apply to all search results.)
Available Bulk Actions: Certain Actions may be limited to users with Managerial roles.
- Copy – Copies selected rows for pasting into Excel or Google Sheets.
- Export – Exports selected contacts; a CSV file will be emailed to you.
- Reassign All – Changes the assigned owner to a different agent.
- Trash All – Moves selected contacts to Trash (does not permanently delete). Contacts can be recovered via the Advanced tab.
- Remove All from Trash – Recovers trashed contacts in bulk.
- Send Email – Sends a mass email to selected contacts. The total number of contacts set to receive the email will be shown at the top of the page.
- You can create your email or use a template.
- Choose who is sending the email and from which email address
- Options: You can choose to add a tag to the recipients of the email

- Send SMS – Sends an SMS text message to selected contacts.
- Add to Automation – Adds selected contacts to Marketing Automation.
- Use the dropdown menu to select the name of the Automation and the Start Date
- Click Okay

- Add to Action Plan – Assigns contacts to a CRM Action Plan.
- Use the dropdown menu to select the name of the Action Plan
- Click Apply

- Tag All – Applies bulk tags to selected contacts.


- Untag All – Removes bulk tags from selected contacts.

Customizing Contact List Columns
You can modify the displayed columns in the search results:
- Click the gear icon.

- In the pop-up window:
- The Reorder column shows the current selections

- Click Add/Remove to make changes. You can select information from the General and Details tab of the contact.


- To change the order, drag/drop the icon to the left of the name
- To remove a column, click the trash icon
- Click Reset, to return to the previously saved columns
- Click Save as Default to save this information going forward
- Click Save for a 'one time' column configuration
