

HELP CENTER / BROKERAGE SETUP
Configure transaction settings
Go to Setup → Transactions to configure brokerage defaults. For Lite setup, start with Statuses and Checklists.
General settings
Go to Setup → Transactions → General. Set the default names for transactions started from a contact and from View Transactions. Text in brackets is filled in automatically from the account or contact record.
Use the settings below to control what happens across your brokerage. Select Save when you finish.
- Signatures. Require hand-drawn in-person signatures and initials, require signers to share their location, or automatically add a date and time to signatures and initials. If hand-drawn signatures are optional at the brokerage level, you can still require them on an individual request.
- Checklists and review. Add compliance checklists automatically, restrict checklist archiving to managers, compliance officers, and transaction processors, or enable the AI pre-check on requested reviews. The AI pre-check is enabled by default.
- Transaction Summary PDF. Limit creation to managers, accountants, and transaction coordinators, or include the brokerage address. Verify the address under Setup → Brokerage → Address first.
- Commissions and earnest money. Hide the Bonus Commissions or Earnest Money tab, hide commission splits from participating agents, or require a manager or accountant to lock commissions before certain status changes.
- Team and transaction type. Lock either field to prevent agents from changing it. Managers, accountants, and compliance officers can still make changes.
Summary PDF defaults
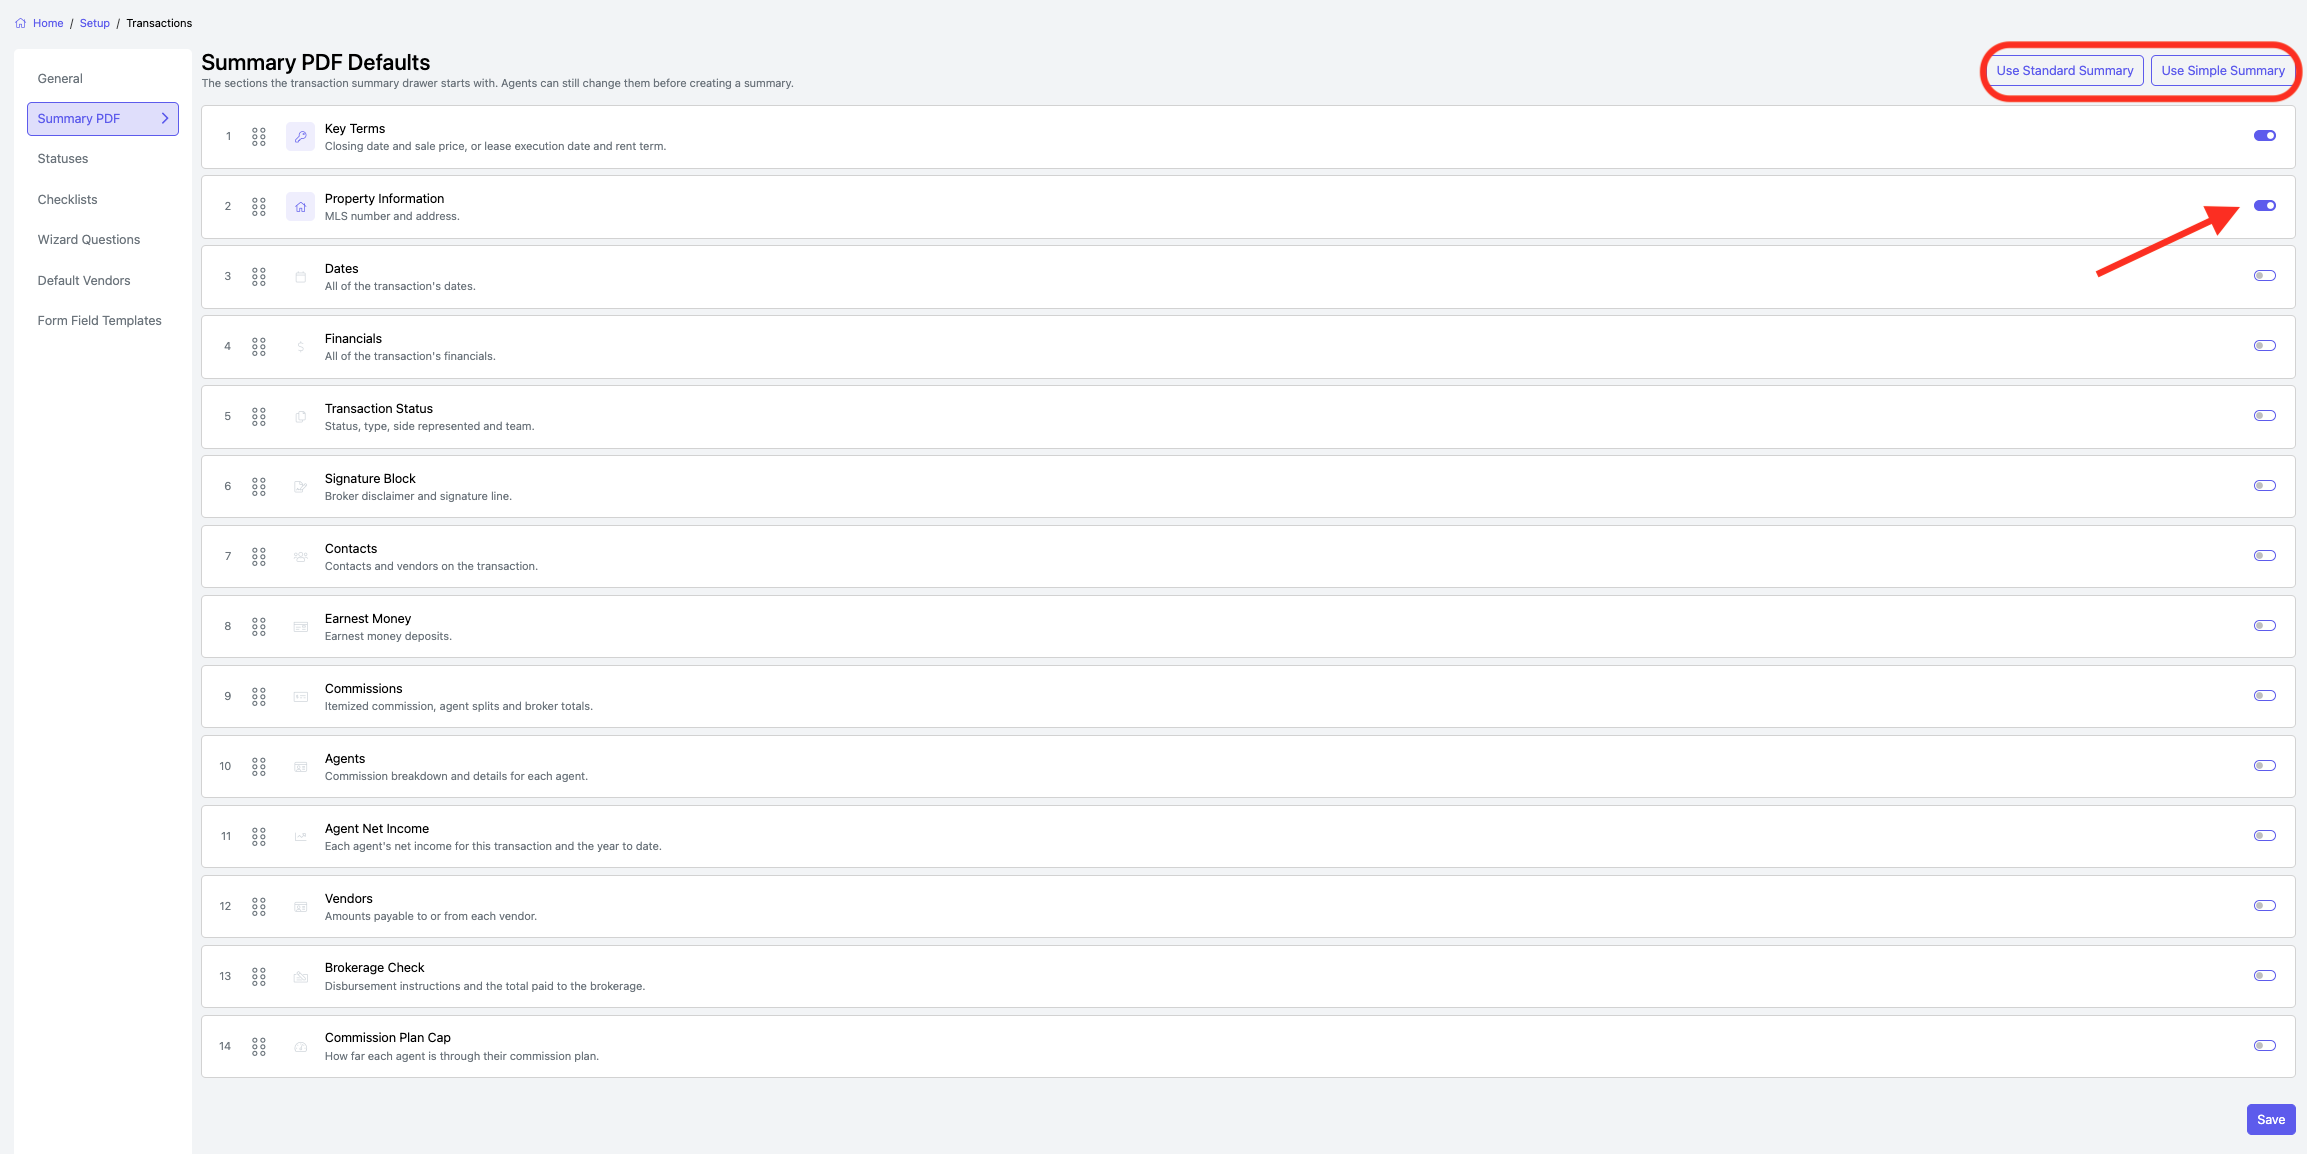
Go to Setup → Transactions → Summary PDF.
- Choose Use Standard Summary or Use Simple Summary. Each has its own defaults.
- Drag sections into order and use the toggles to choose which sections are included by default.
- Select Save. Agents can still adjust the sections and their order before generating an individual PDF.
Select the screenshot to open it full size in a new tab.
Transaction statuses
Go to Setup → Transactions → Statuses. The first enabled status is used for new transactions. To change the default, drag another enabled status to the top.
- Edit a status. Select Edit to change its name, description, color, or permissions. Use Settings to control which actions general users can take and which are reserved for managers. Status setting changes apply to new transactions.
- Add a status. Complete the General and Settings tabs, then select Save. After you save a status, you can disable it.

Select the screenshot to open it full size in a new tab.
Compliance checklists
Go to Setup → Transactions → Checklists. Open a checklist by its name or select View. To archive it, select Archive in the upper-right corner.
Create a checklist
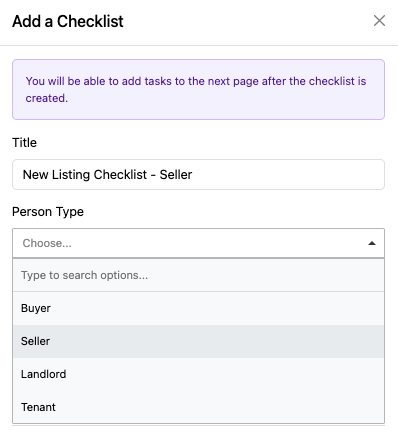
- Select Add a Checklist. Enter the title, person type, transaction type, review type, and owner. The owner determines which brokerage, region, subregion, or office can use it.
- Choose Standard to request review at a designated checklist step. Users wait for that review before continuing. Choose Review Each Item to send completed items for individual review while users continue with other tasks.
- Select Save once your changes are complete.
If a checklist is missing: Confirm the transaction matches both the checklist’s person type and transaction type. If the wizard’s Who Do You Represent question assigns a transaction type, use that same type on the checklist. Manage types under Setup → User Fields → Transaction Types.
Select the screenshot to open it full size in a new tab.
Add or change tasks
Select Add via AI on an empty checklist, answer the prompts, and select Generate Tasks. Review the generated tasks before saving. To build the list manually, select + Add a Task, enter a description, and choose the task type.
- No Review Required: The agent completes the task without requesting review.
- Select Documents: The agent selects documents for review before completing the task.
- Request Review: The agent submits the checklist to compliance after marking earlier items complete or not applicable.
- Require Information: Require a saved Property or Base Commission tab, a specific Financial field, or a Calendar date. These tasks are always required.
- Require Transaction Status: Choose the status that will be applied when the task is completed.
Use Required to make a task mandatory and Active to show it on the checklist. Drag tasks to reorder them. To remove an existing task from the workflow, clear Active and move it to the bottom. Select Save.
Wizard questions
Go to Setup → Transactions → Wizard Questions. Open the brokerage or office question set by name, or select View.
- Set up form groups first under Transactions → Forms Library. See Upload forms and create wizard questions.
- Select + Add a Question, enter the question, and use + Add Answer to add choices that point to the relevant form groups.
- To organize documents automatically, select the option to create a transaction folder named after the form group. Select Save.
Use Edit to update a question or its answers. Use the Order handle to move a question, Discard Changes to undo unsaved edits, or Delete to remove a question.
Default vendors
Go to Setup → Transactions → Default Vendors. Select the person type (buyer, seller, landlord, or tenant) and add, edit, or remove vendors. Choose a Vendor Type, select the vendor, and select Save.
Only vendors already in the CRM with the brokerage as the owner are available.
Form field templates
Go to Setup → Transactions → Form Field Templates to find templates saved from documents. Select Edit to rename or archive a template, then select Save.