HOW TO CREATE AND SEND AN E-SIGNATURE REQUEST
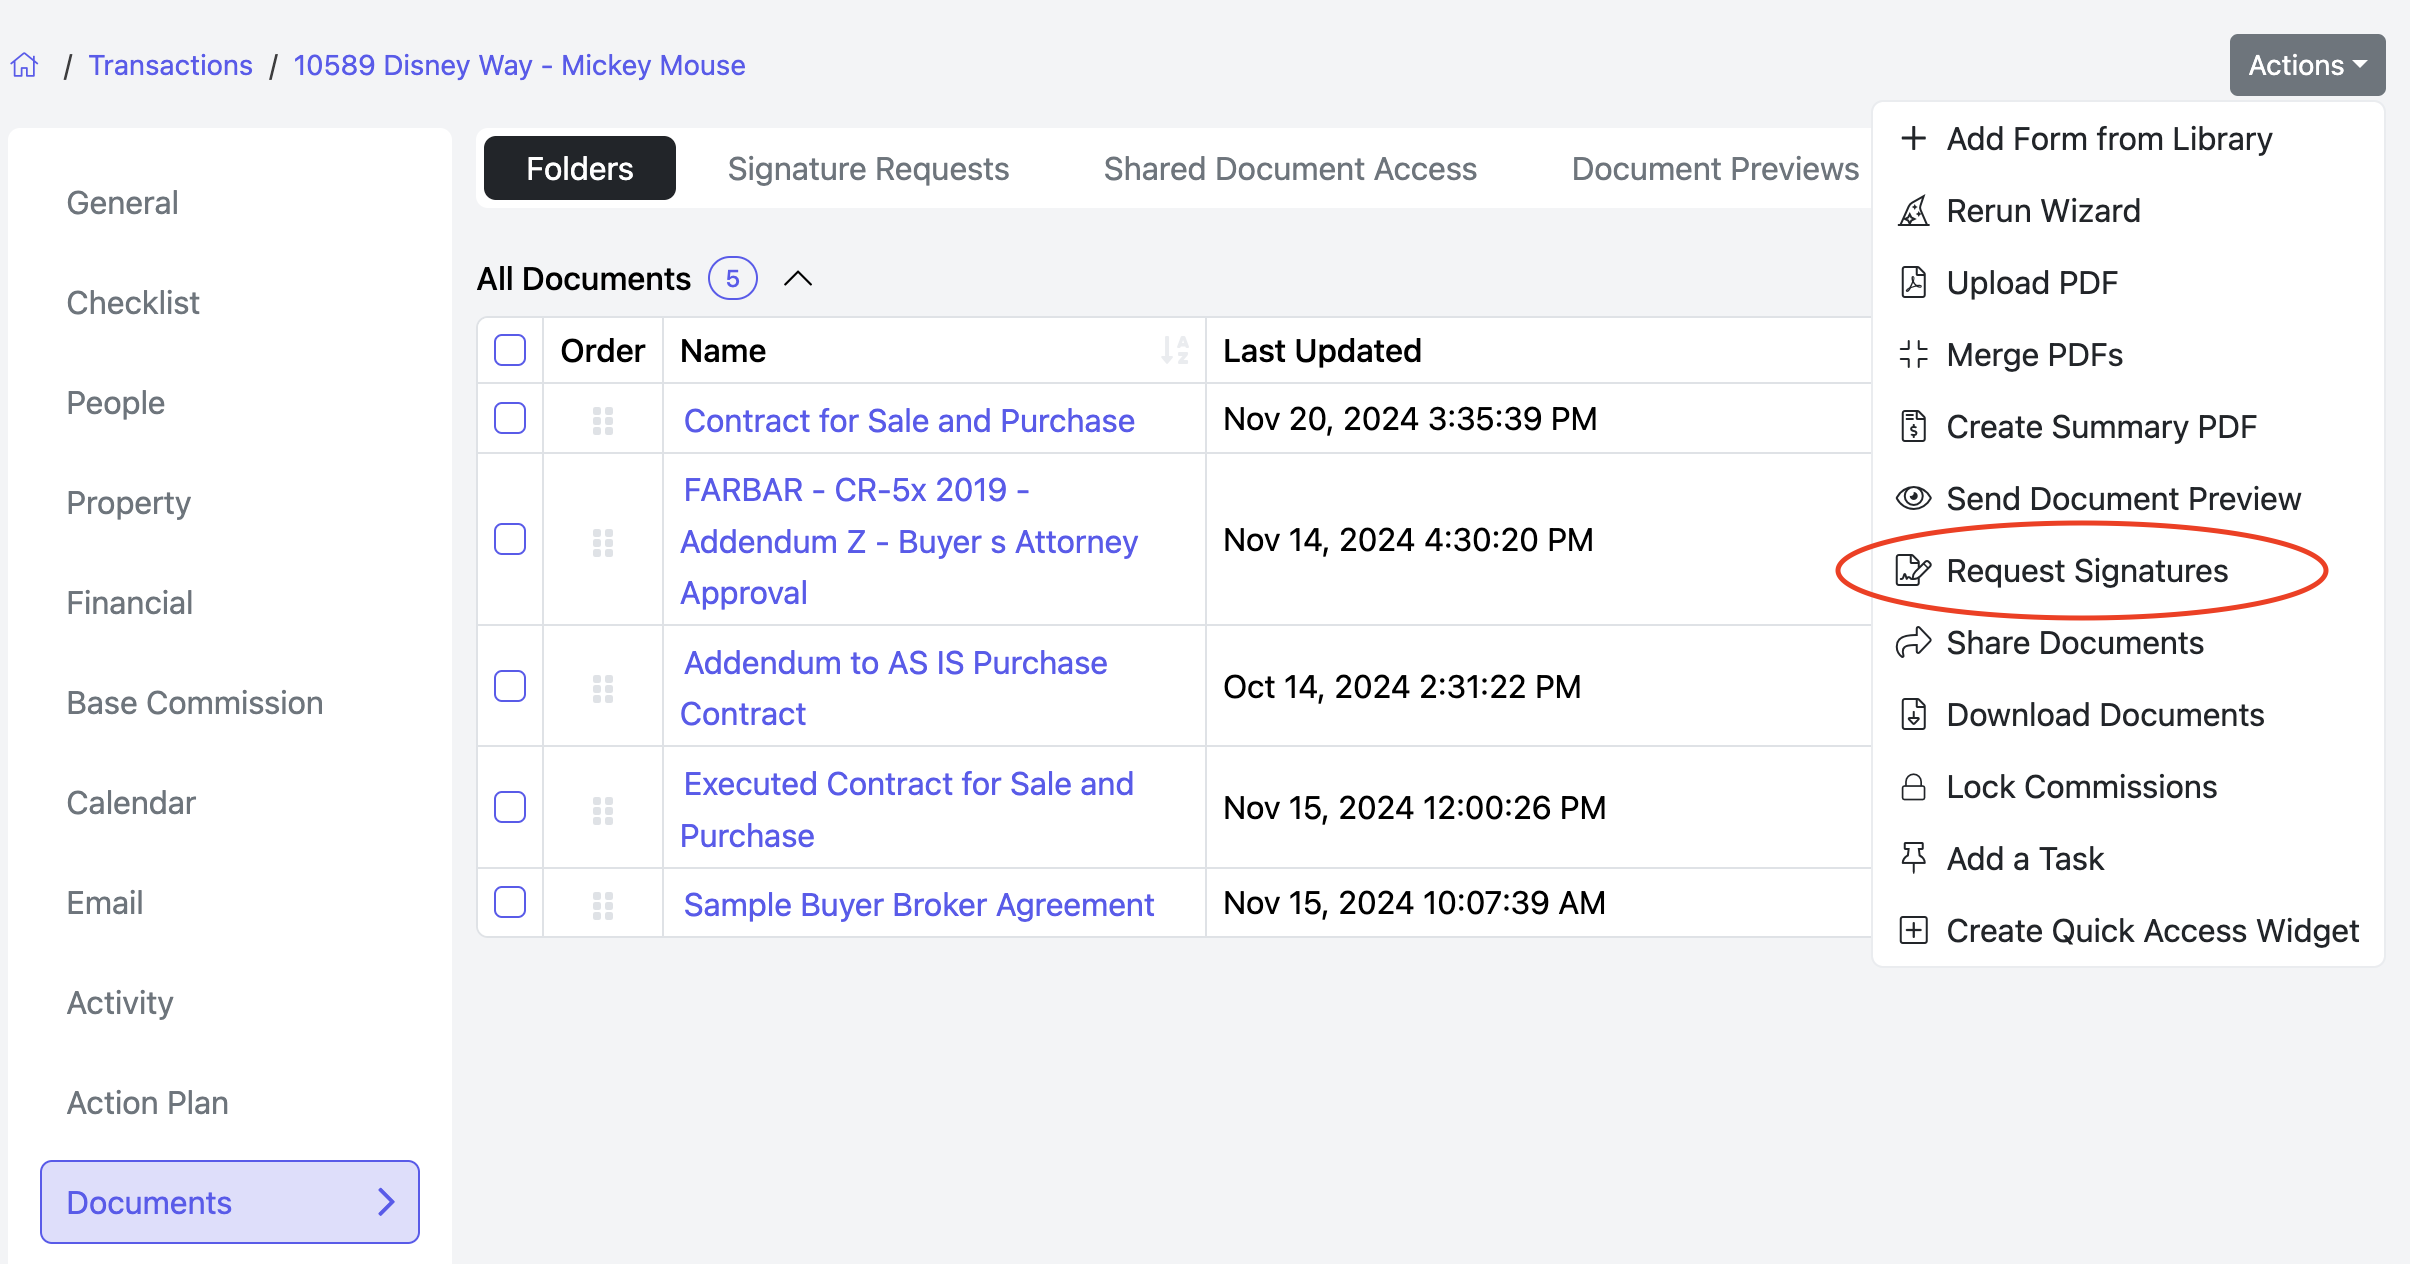
To request signatures, go to the Actions menu at the top-right corner of the Documents tab within a transaction.
Then, click Request Signatures.
These requests do not expire until the agent cancels the request.
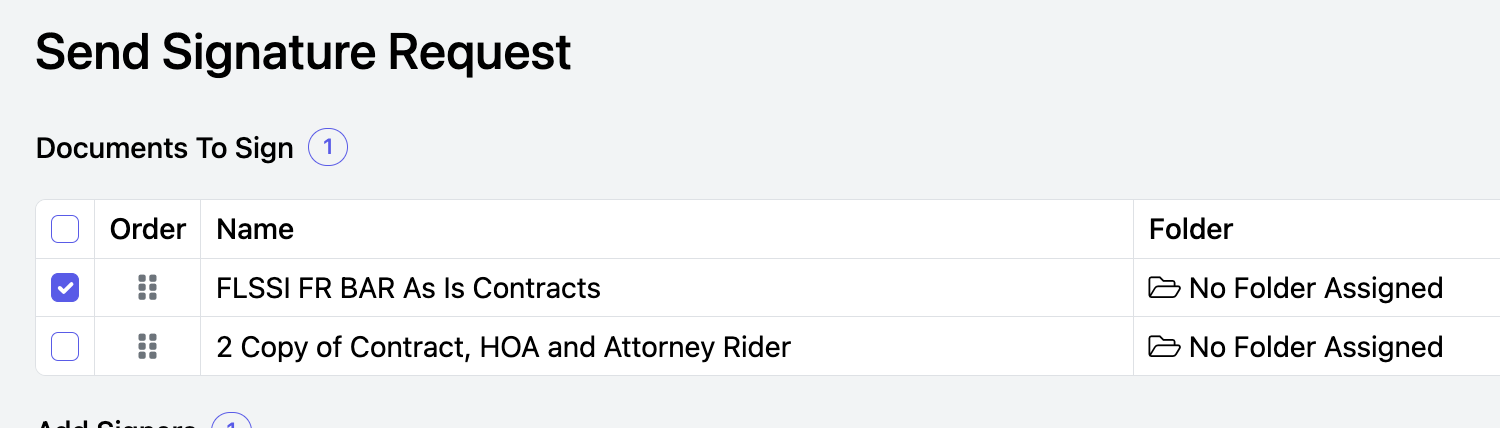
- It will bring you to the following page, where you can select the document(s) you want to send out for signature.
- You can use the Select All button to quickly select all documents.
- You can also drag the icon in the Order column to rearrange the order in which the documents are presented for e-signature.

- If a document is not on the list of documents, click on the Document missing? button, and it will show you which documents can't be signed and why.

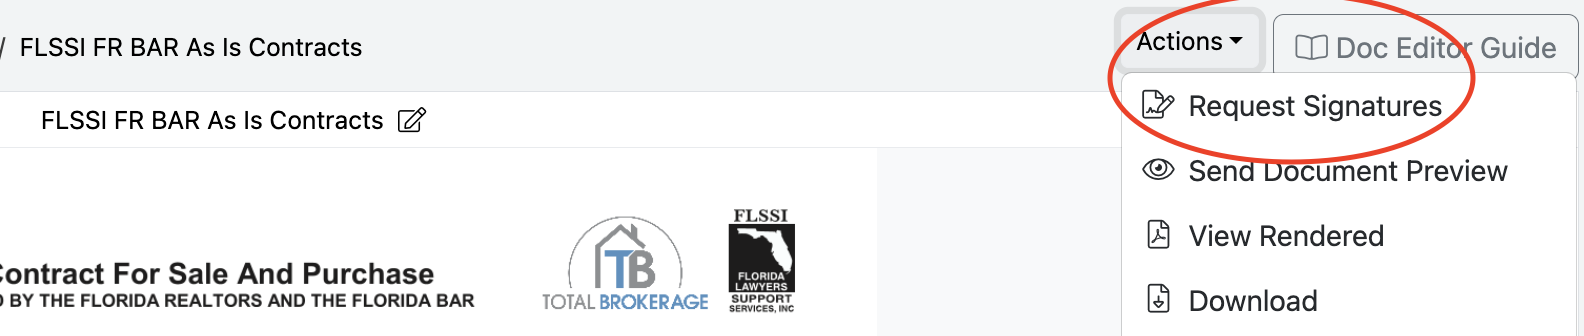
You can also request signatures directly from a document by selecting Actions > Request Signatures. The document will automatically be selected in the document list, allowing you to quickly prepare and send it for e-signature. You may select additional documents as well if needed.
- In the next section, you can choose which signers you want to request, and the method of signing (email, SMS, or on this device).
- You can also choose to send them an automated daily email reminder for a specified number of days after the signature request or until they sign.
- If the reminders option is selected, you can also choose to cancel the signature request at the conclusion of the reminder emails, or if the recipient opts out of the reminders.

Send Email - You may choose which email to send the signature request to and add comments to the email for the signer.
Send SMS - You may choose which phone number to send the signature request to and from. This option will appear if your brokerage has SMS messaging in its plan.
Sign On This Device - This will allow the signer to sign on the same device you are sending the request from. This is ideal for in-person signing or if you are signing a document yourself.
Add signers for the same documents by pressing the + button.


Remove a signer by clicking the X.

OPTIONS:
- Send Signature Requests One by One, which will make it send to one signer at a time in order.
- Require Wet Ink Signing, which requires the signer to use a touchscreen or mouse to sign.
- Require Geolocation, which will share their location when they complete the signature request.
- Share documents after Signing with Accounts, Contacts and Vendors. When this checkbox is selected, you can add contacts, vendors, set an expiry date of never, 1 day, 1 week, or 1 month, and add comments. After all signature requests are completed, this feature sends a document share to chosen contacts and vendors. If a request is canceled or expires, shares won't be sent. Any unsigned documents will be auto-marked as signed for sharing.

- After you are done filling out the Signature Request, press the blue Send button at the bottom right to send the signature request.
- After you click Send, you will be brought to a status page that updates you on when they have viewed/signed the requests.


DOCUMENTS > SIGNATURE REQUESTS TAB
- Check the status of your document signature requests by navigating to the Signature Requests section of the Documents tab of the transaction.
- These requests do not expire until the agent cancels them.
- All signature requests will display showing the status.

RESEND A SIGNATURE REQUEST
You can resend the request by clicking the Resend button.

A box will slide open on the right where you can select the request method and if the customer has multiple email address, you can use the dropdown from email to select the appropriate one.


Once the selections have been made, press Send.

CANCEL A SIGNATURE REQUEST

After clicking Cancel the following box will display.

Click Yes to cancel this signature request.


- After clicking Yes, some documents may go back to editing mode, depending on if they were previously signed.
- NOTE: If these documents were in a task list, please update your task list with the new version of the document.

E-SIGNATURE COMMENT TEMPLATE
Adding a Signer and Using the Enhanced Comment Box
When adding a signer, you will see a Comment box where you can customize a message to send along with the signature request.

Setting a Default Comment
To set a default comment for future comments:
Enter your message in the Comment box.
Check the box labeled "Add this comment by default".
- This ensures the comment will automatically populate in all signer comment boxes for both current and future transactions.
Using Comment Templates
- For frequently used messages, you can create and apply templates:
- Click the "Template" button in the top right corner of the comment box.
- Creating a New Template:
- Select New Template.
- Enter a Title and the Template text.
- Click Save to store the template for future use.
Using an Existing Template:
- Select Choose Existing and pick a previously created template from the list. The text will automatically populate the comment box.
Benefits of Using Comment Templates and Default Comments
- Efficiency: Save time by reusing frequently used messages.
- Consistency: Ensure uniform messaging across multiple transactions.
- Personalization: Easily customize comments with placeholders, and manually replace them with the appropriate information before sending the request.